Translate this page into:
Clinical photography: A to Z
Address for Correspondence: Dr. Arun Nayak, Fort Dental Clinic, 2nd Floor, Sambava Chambers, 20 Sir PM Road, Fort, Mumbai - 400 001, Maharashtra, India. E-mail: drarunnayak@yahoo.com
This article was originally published by Wolters Kluwer and was migrated to Scientific Scholar after the change of Publisher.
Abstract
Clinical orthodontic photography is a vital skill set that every practicing orthodontist should master to be successful at the documentation of case records, patient education, peer presentations, marketing, and at acquiring additional certifications. This article aims to review various aspects of orthodontic photography and relevant research.
Keywords
Camera
documentation
extraoral photography
intraoral photography
photography
record keeping
INTRODUCTION
As a clinician, it is mandatory for orthodontists to learn using a camera and to master clinical photography skills for the following reasons:
Documentation of records for medicolegal reasons
To compare pretreatment and posttreatment results
To document findings that may be unique and to share those findings with peers
For obtaining data to make presentations and teaching students
To use data in clinical practice for patient information and motivation
Mandatory requirements of certification examinations
What we learn today is because of the clinical photographs, we see in textbooks. These were available courtesy the efforts of those authors. The profession will be furthered, and our next generation will learn if each clinician as a torchbearer of the subject makes that the same effort.
The hallmark of great presentations or literature is often the consistency of the superior quality of the clinical photographs. Most orthodontic residency programs insist on honing photography skills. However, as a resident ventures into the world of clinical orthodontics, photography skills appear to be lost due to various reasons, namely, difficulty in carrying equipment at various centers, costs involved in purchasing equipment, lack of interest in documentation, etc. Fortunately, like any other habit, once motivated internally as a clinician, relearning those lost skills is just a matter of practice. More importantly, though DSLRs have overwhelming capabilities for orthodontic photography, one needs to learn only three controls (aperture, shutter speed, and International Standards Organization [ISO]). This article has been written to provide precise information relevant to clinical photography.
SELECTING A CAMERA FOR CLINICAL PHOTOGRAPHY
A professional DSLR camera with a macro lens and ring flash will cost anywhere upward of USD1300. Such a camera is an excellent investment for the long term for consistent and extremely professional quality pictures. They offer interchangeability of lenses and full manual controls. Lenses commonly accompanying DSLR camera kits (e.g., 18–55 mm [~×3 zoom] and 18–105 mm [~×6 zoom]) are zoom lenses. They are not suitable for orthodontic photography. Do keep in mind that an 18–105 mm kit lens at 105 mm focal length is not the same as an 105 mm macro lens.
Point and shoot cameras do not offer the consistency and comparable quality of pictures. The problem with many of these compact cameras is that they do not have a lens/flash combination that can produce high-quality intraoral images in a standardized form that will allow comparison between time points. Most of the consumer cameras also produce some image distortion as the lenses are rarely up to the job of close-up photography.[1]
Jonathan Sandler recommends Canon EOS 50D with a 100 mm f2.8 Macro USM lens and Canon MR14 EX Macro Ring Flash assembly.[1]
My recommended equipment is Nikon DSLR body as per budget, Sigma EM 140 DG Ring Flash, or equivalent Nissin/Vivitar flash for Nikon mount [Figure 1]. Dual flashes such as Nikon R1 and R2 and their Canon equivalents are also excellent but more expensive than macro flashes. Macro lenses of Tamron (90 mm) and Sigma (105 mm) cost a third of their Nikkor (105 mm) and Canon (100 mm) counterparts.
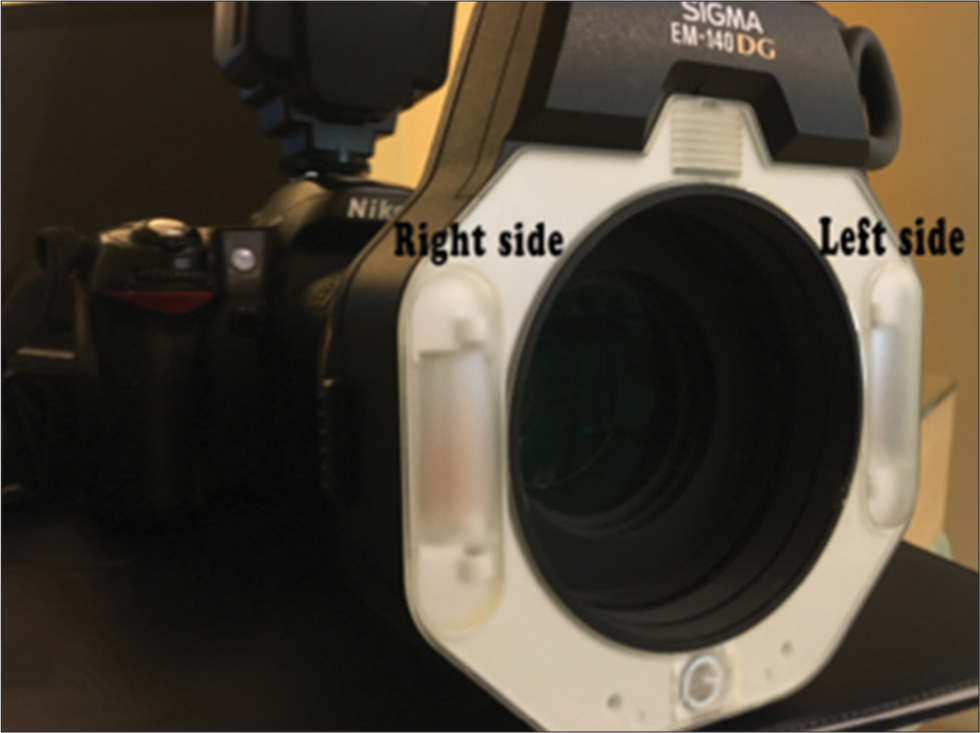
- The Nikon DSLR Tamron 90 mm macro and Sigma Flash assembly
While using DSLRs which are not full frame, there is usually a crop factor of 1.5; this means that a 105 mm lens now functions such as a 157.5 mm lens. Therefore, 90 mm macro or even a 60 mm macro will offer similar focal lengths as the 105 mm in the erstwhile film format cameras. Do not worry about megapixels.
A 4 inch × 6 inch print requires approximately 2 MP resolution images. Any camera that offers to 8 MP is good enough for clinical documentation even if part of the image is cropped to eliminate distractions.
In a study comparing ten SLR cameras of different makes with manufacturer recommended lenses and flash, it was found that all cameras produced high-quality intra- and extra-oral images, once appropriately adjusted. The resolution of the images is more than satisfactory for all cameras. There were significant differences relating to the quality of color reproduction and ease of use.[2] However, in our experience, the cited issues are easily handled in postprocessing.
Recently, Shofu has introduced a camera exclusive for dental photography. The EyeSpecial C-II [Figure 2] adds consistency and efficiency and supports the varied dental photography needs of the active practice. It has eight built-in modes for standard intraoral photography, for surgery, for mirror pictures, for shooting facial views, or half-body portrait among others. However, it retails much expensive than the setups mentioned before.
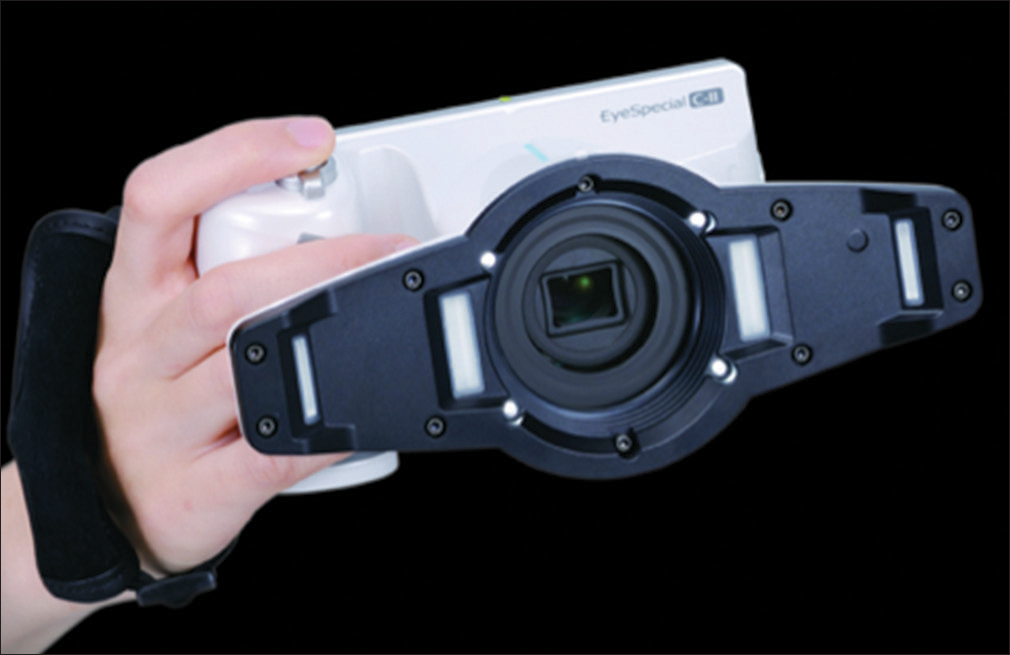
- The Shofu Dental Eye CII
BASICS OF PHOTOGRAPHIC CAPTURE
A clinical photograph should have the following properties:
Subject should be captured optimally, with nothing excess that may divert attention from the subject, yet no part of the subject should be left out
All parts of the subject should be in sharp focus with no blurring
All parts of the subject should be in good light. Shadows should not obliterate any part of the subject
The composition rule of third that may apply to creative photography and does not apply to clinical photography. Subject should be centered in the photograph
Subject should be well isolated
Alignment of the subject should be pleasing and easily interpretable.
To achieve the above objectives, one should learn:
Using flash and camera controls to achieve high-resolution pictures with optimal sharpness, brightness, and no shadows
How to focus the camera on the subject
Rules to follow (standardization) to compose a picture in a clinical setup.
Fortunately, clinical photography involves a subject that is generally within the photographer’s field of control; unlike say, wildlife photography where the subject may appear and disappear in a fraction of a second.
Light conditions in clinical photography too are under the photographer’s control unlike say, outdoors photography where a sudden cloud cover can dramatically reduce light of a sunny day.
You can thereby employ these advantages of time and light to compose a good clinical photograph having all the above-mentioned properties.
USING FLASH FOR CLINICAL PHOTOGRAPHY
Flash is an integral part of clinical photography.[3] Every quality of light including flashlight has a Kelvin equivalent temperature [Figure 3].
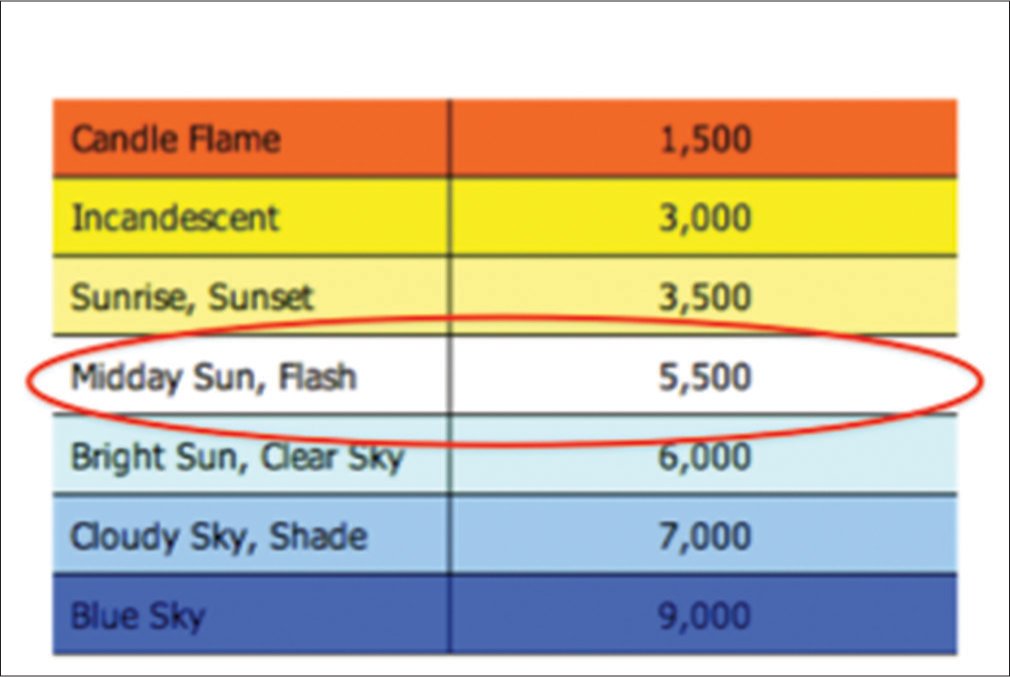
- Quality of light and its temperatures
What is highly relevant to us is that midday sun or daylight, and camera flashes have the same temperature. This means that using camera flash is equivalent to using daylight akin to photographing your subject the way you see it in daylight in its most natural colors.
Flash also tends to override any other ambient light that may be present in your operatory. Therefore, in terms of quality of light, flash of the camera serves the best.
In terms of quantity, one should keep in mind that distance of the flash from the subject can alter the saturation of the colors of your subject.
In the following example, one can see how a small flash-subject distance, and therefore high intensity of flash tends to reduce the saturation of the subject colors [Figure 4].
- Flash too close can destroy colors and even details
The built-in camera flash is always a point source of flash and gives distinct shadows. These shadows serve to distract attention from the subject as in the picture below. One can see shadows on the patient’s right side because the flash on camera is on the right of the lens [Figure 5]. Therefore, its mandatory to use a ring flash/dual flash for intraoral photography.
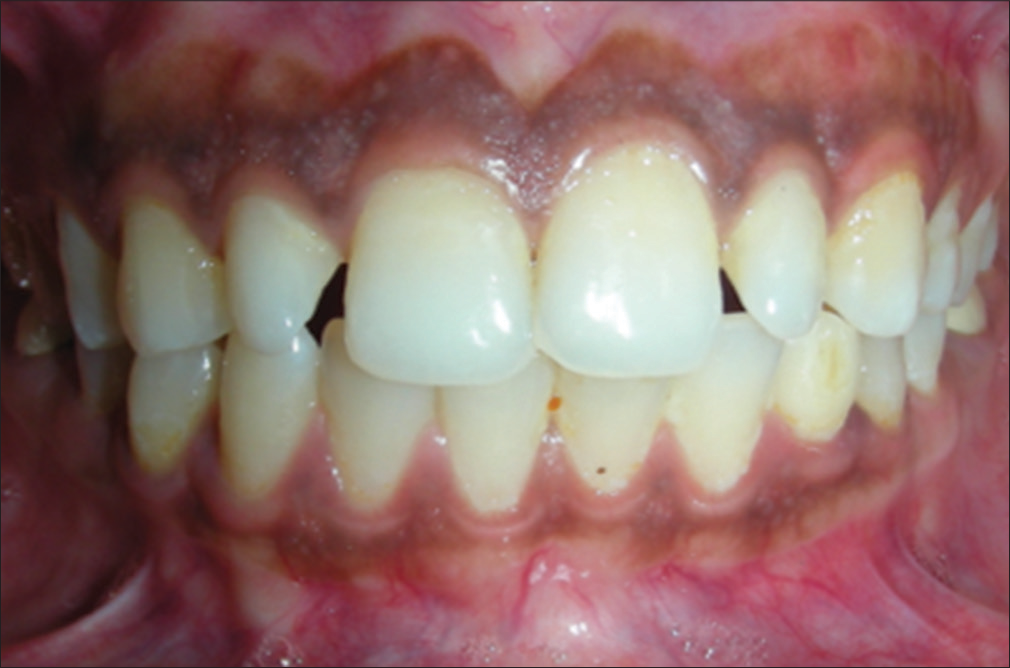
- A right-sided flash can cause shadows on the patient’s right side
USE OF RING FLASH AND DUAL FLASHES WITH DSLR MACRO LENS
Ring flash surrounds the lens and provides light from all around the lens. The subject tends to get lit from all directions. This eliminates shadows. Ring flashes are a mandatory investment to complement an SLR macro lens. The Sigma EM 140-DG ring flash is an excellent lifetime investment. It has two flashes within the ring [Figure 1]. These can be individually switched on and off and can also be used simultaneously.
Dual flashes provide a two-point source of light, and creative usage of these controls helps to eliminate the shadows that are associated with a single point source of light.
Dual flashes can be complemented with diffusers (often part of kit). These flash diffusers soften the light and can give beautifully soft-lit photographs [Figure 6].
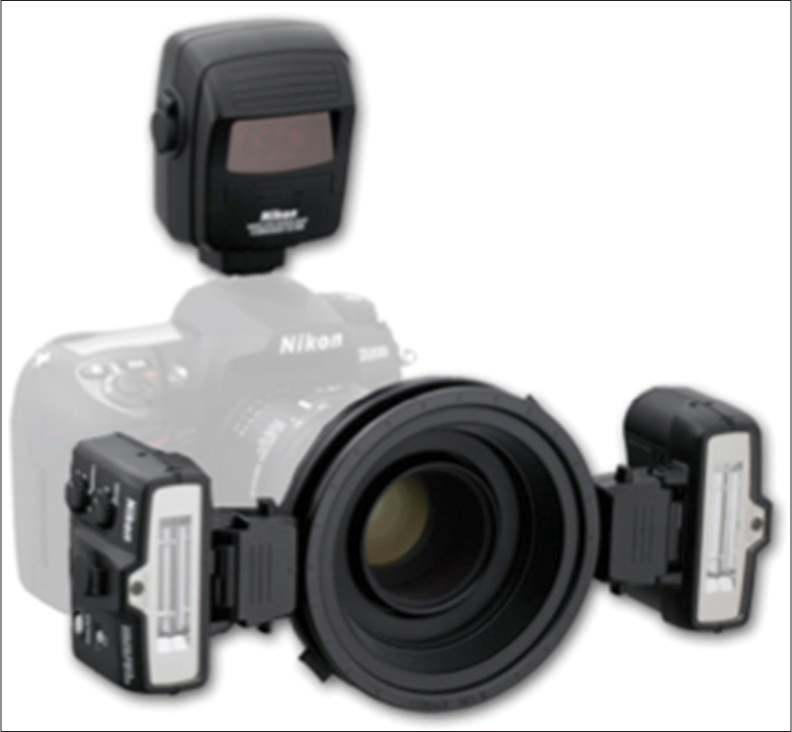
- The dual flash system of Nikon r1c1
It is vital that one reads and understands controls of the flash to be able to use it optimally. Once learned and practiced often, these are never forgotten.
USE OF CAMERA CONTROLS
Aperture controls
Aperture controls are present in DSLRs and prosumer cameras. They may not be present in compact zoom cameras. Aperture controls can be used for two reasons:
To control the amount of light coming in 2. To alter the sharpness of the picture through the subject’s depth (depth of field).
Aperture control and light
Aperture is the hole in the lens through which light enters and reaches the sensor. Much like the iris of the eye. It is commonly referred to as the f-stop.
The f-stops which denote the diameter of the aperture may range from f/2, f/2.8, f/3.2, f/4, f/5.6, f/6.3, f/7.1, f/8, f/9, and so on till f/32 or more [Figure 7].
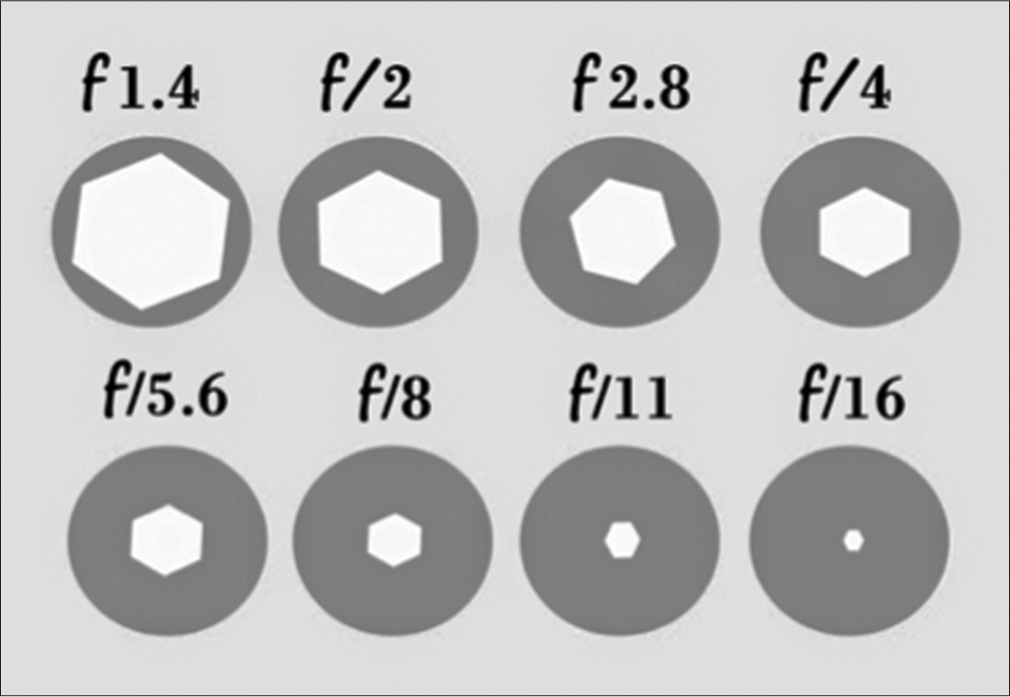
- Aperture size and its relation to the f-number. The f-number indicates the diameter of the aperture of the lens in mm. For example, for a focal length of 100 mm, f/8 stands for 100/8 = 12.5 mm wide aperture, and f/4 stands for 100/4 = 25 mm wide aperture. Thus, smaller the f-number, greater is the size of the aperture
F stands for focal length of the lens involved. For example, if the camera has a 100 mm lens; then,
At f/4, the diameter of the aperture is 100/4 = 25 mm
f/8 = 12.5 mm diameter of the aperture
f/16 = 6.25 mm diameter of the aperture.
Thus, its seen that as the f-stop increases, the aperture becomes smaller in size.
Consequently, as the f-stop increases, the light entering the camera becomes lesser, and therefore the picture becomes darker.
Aperture control and depth of field
As the f-stop increases the amount of sharpness through the subject’s depth increases. For example, in Figure 8a, the focal plane is the red GP box, but a low f/number causes the other GP boxes to be out of focus. Simply by increasing the f/number, the picture in Figure 8b now has greater depth of field. Thus, aperture control can be used to alter the depth of field.

- (a) Three objects at f/2.8 causing a shallow depth of field. (b) The same picture was taken at f/40, the depth of field increases with sharpness at all depths
For clinical photography complemented with an external flash, it is highly recommended to use a high f/stop ranging from f/25 to f/32. Check your camera manual on how to use aperture controls.
When using manual focus with your DSLR and macro lens, always focus at one-third of the depth of the field for excellent sharpness throughout the depth of the image. For example, if taking an intraoral frontal view, focus of the canine should be sharp. Even if the incisors look blurred do not worry, when you click, a high f/stop will ensure that the incisors as well as molars are in focus.
Shutter speed controls
Shutter is a part inside the body of the camera that allows the light emerging from the lens to fall on the camera’s sensor.
If the shutter has a fast speed, it lets in less amount of light (darker image) but gives a crisp and sharp image.
If the shutter has a slow speed, it lets in more amount of light (brighter image), but the image may be soft or blurred.
Shutter speed can range from a long 30” (30 s exposure) to a slow 8 (1/8 of a second) to a fast 400 (1/400 of a second) to a superfast 5000 (1/5000 of a second).
Rule of thumb for getting a sharp picture with a handheld camera is that the speed should be 1/focal length of the lens.
Therefore, while using a 100 mm lens, you should use a shutter speed of 1/100 of a second or faster.
When using a slow shutter speed (1/60 and below), there is a chance of blurring of the picture with a handheld camera. In such situations, it is mandatory to stabilize the camera with a tripod.
Check your camera manual on how to adjust shutter speed. Recommended shutter speed is 1/80 of a second for intraoral and 1/100 for extraoral pictures.
International Standards Organization controls
ISO represents the sensitivity of the sensor to the available light.
ISO is generally available in the range of 100, 200, 320, 400, and so on to up to 6400 or in advanced cameras even up to 100,000 or more.
Higher you set ISO on the camera, the camera sensor becomes that much more sensitive to light.
The picture of a young boy was taken inside a dark shed. Due to the extremely low ambient light, and at a low ISO of 100, the sensor was not sensitive to the available light and gave a dark image [Figure 9a]. However, in the next picture, the ISO was increased to 1000. This makes the sensor extremely sensitive to whatever light is available and an image with the right exposure was achieved [Figure 9b].

- (a) The left picture is taken at a low International Standards Organization causing a dark image, (b) the right picture is taken at a high International Standards Organization resulting in much brightness of the image
Always try to use an ISO as low as possible in clinical photography because at higher ISO though the picture becomes brighter, it also shows a lot of graininess, technically termed as noise. Recommended ISO for orthodontic pictures is 100–200. Do read up the camera manual to understand how to change ISO settings.
INTERPLAY BETWEEN ISO, APERTURE, AND SHUTTER SPEED
ISO settings, aperture, and shutter speed are three important factors that determine the correct exposure of your subject. Spend time to understand the use of these controls and its influence on your pictures.
If you are getting an incorrect exposure, you can alter any of these three to get the correct exposure.
For a dark image to become bright:
Lack of light is always a challenging situation in photography
You can increase ISO or widen aperture (reduce f-stop) or reduce the shutter speed
Reducing shutter speed will either require stable hands or stabilization with tripod
Increasing ISO will, however, increase the graininess of the image.
For a bright image to become dark:
Excess of light is always a happy situation to be in photography
You can reduce the ISO to as less as possible
Or make the aperture narrower (increase f-stop)
Or use a faster shutter speed.
ACCESSORIES
Accessories are required to maintain isolation of the subject, to make the subject clearly visible on the camera, to enhance the light falling on the subject, to eliminate distracting elements from the frame, and to stabilize the camera if need be.
The following accessories are commonly used in clinical photography:
Retractors – To retract lip and cheek to isolate the subject
Contrasters – To eliminate distracting elements from the photograph
Mirrors – To provide indirect vision when the subject is not directly visible on camera.
Retractors
Cheek retractors [Figure 10] such as plastic ones are useful for retracting the cheeks while taking intraoral pictures. The single ones help more in retraction than the double ones. All of them are autoclavable. Metal retractors do not break, unlike the plastic ones.
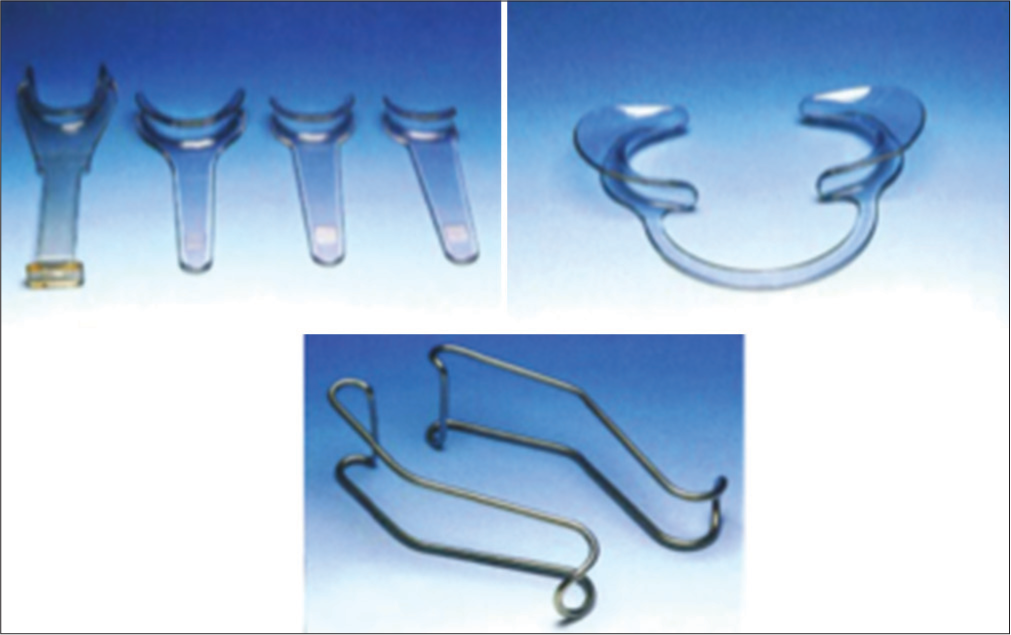
- Types of cheek retractors
Lip retractors [Figure 11] are useful to keep the lip away when the front teeth need to be photographed or for clicking mirror pictures of the occlusal surfaces.
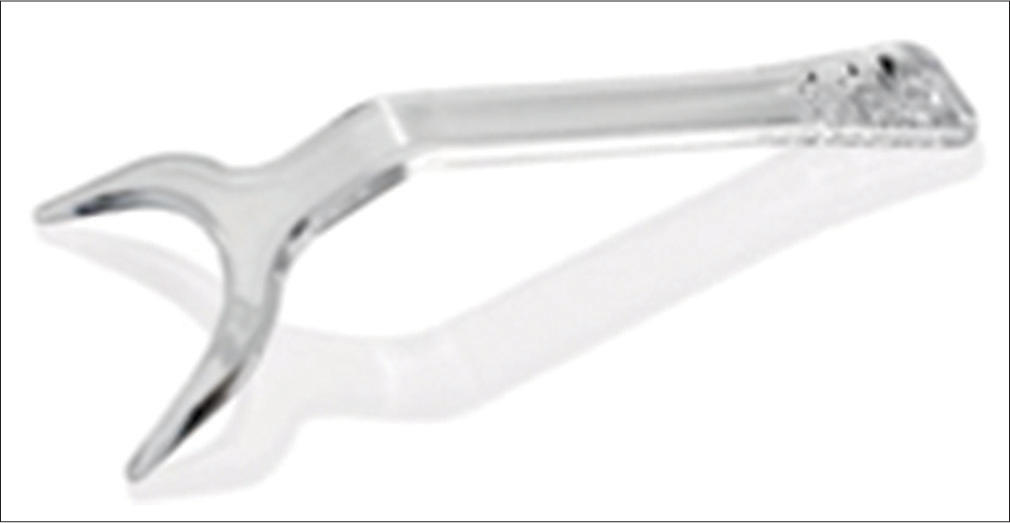
- Lip retractors to keep the lip away during occlusal pictures
Contrasters
In the picture below, the tongue in the background is a distracting element that takes attention away from the subject, the front teeth [Figure 12].
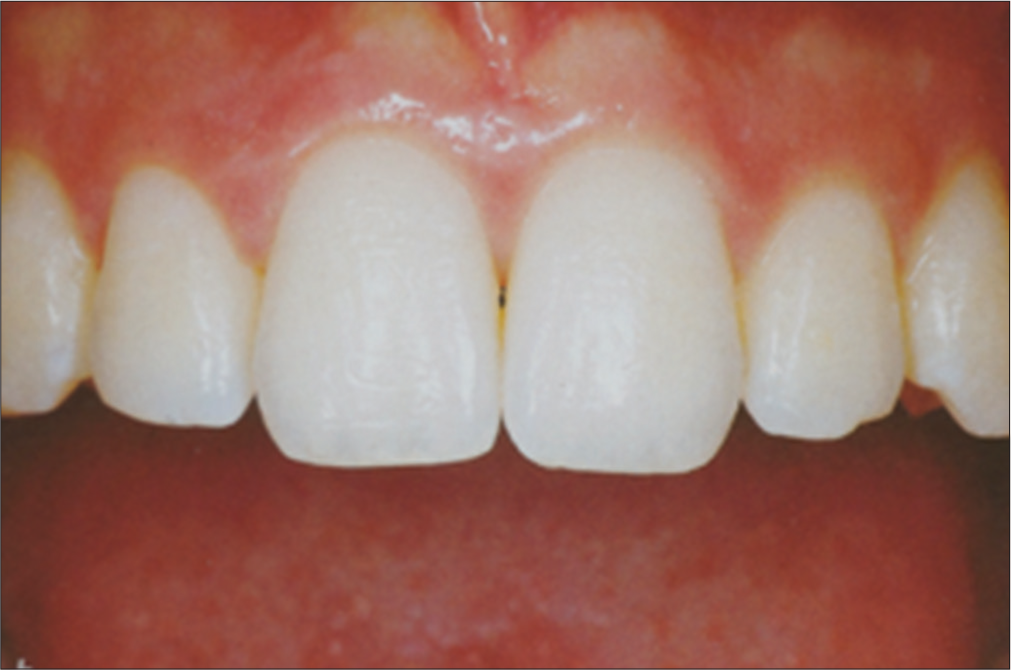
- Close-ups with tongue as distraction
Using a contraster such as ones available from www.doctorseyes.com is useful in eliminating these distractions. They are placed as shown in Figure 12. If the patient is holding the retractor, the doctor can hold the contraster himself while clicking the picture. Else, an assistant may be trained to hold the contraster. It should be kept in mind that the contraster should be as far away from the teeth as possible to prevent it from reflecting flashlight [Figure 13].
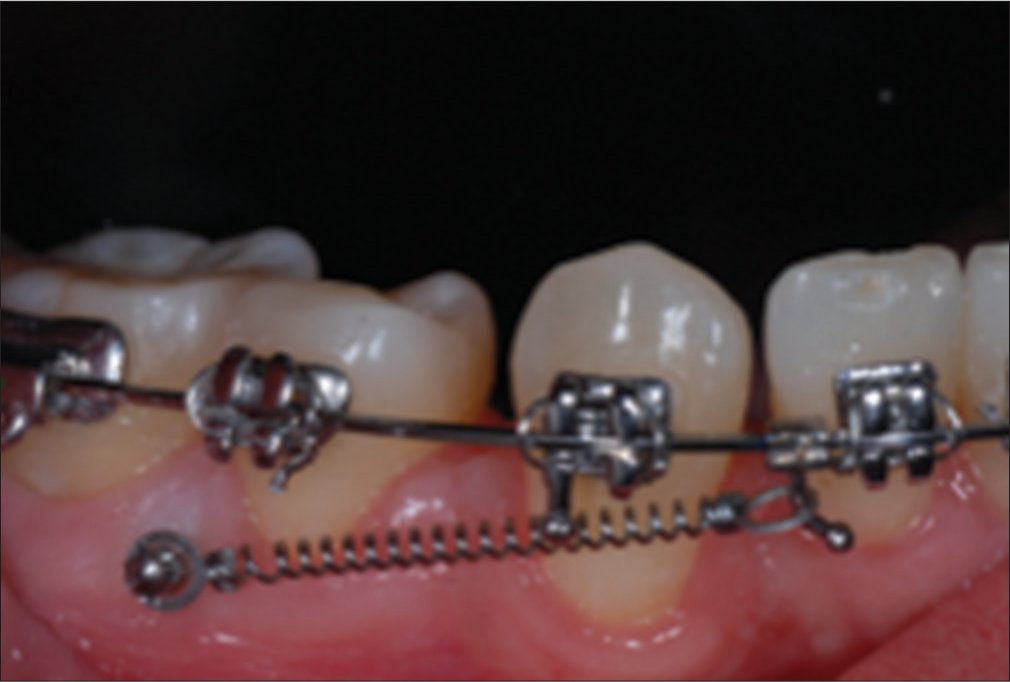
- Use of contrasters to provide a noncluttered backdrop
CONCEPT OF MANUAL FOCUSING
Manually focusing is recommended[1] because it is impossible for the camera to “know” on which part of the frame the operator would like to focus. Focusing essentially means turning the lens barrel to achieve a sharp rendering of any specific part of the subject.
STANDARDIZATION FOR CLINICAL PHOTOGRAPHY
Clinical photography skills are developed over a period of time of maintaining discipline. Once you have formulated a list of pictures to be taken, try to standardize the rules for framing each picture. Ensure that each and every picture is taken following the exact same rules and soon you will have a wonderful collection to be proud of. As a guideline, the rules for framing facial and intraoral pictures have been elaborated here. You may take cues and formulate a list of rules for your own pictures.
GENERAL RULES
Facial photographs can be used either for documentation or for creative uses such as websites and brochures. For creative pictures, one need not follow the rules, but for documentation, one needs to follow strict guidelines
Use a clean white, off-white, gray, and black background with no design patterns for facial portraits. Do not use curtains, the folds, and design patterns, of which can present huge distractions. Do not use red backdrops. If one is using a green cloth as a backdrop, ensure there are no bloodstains or any other stains and it is well ironed without folds
Patients are always used to clicking casual portraits. They may not be able to position their head on verbal instructions. One should guide the patient as to head positioning or have an assistant doing the same for documentation portraits.
Rules for framing a frontal facial picture
Head straight not tilted either to left or right [Figure 14]
 Figure 14
- Extraoral portrait at rest/smiling
Both the ears equally visible, no hair over it, no distracting jewelry, this will ensure no horizontal tilt
The tragion-orbitale-tragion line should be parallel to the floor
The lips should be at rest or in posed smile as required
Guide the patient should look directly into the lens
Focus for the eyes to be sharp
Upper frame of the photograph should be just above head
Lower frame should be at level of suprasternal notch
Shutter speed 1/80, ISO 200, and f/9–f/11
Keep the flash setting at TTL-BL and keep the right side flash on. Turn the flash so that instead of being at the side, the flash is now 90° and on top of the head. The shadows will now fall below the ears and behind the head.
Rules for framing a profile facial picture
Patient should look straight ahead at eye level [Figure 15]
 Figure 15
- Extraoral portrait
Upper edge of frame should be just above the part in the hair
Lower edge at suprasternal notch level
Left edge just behind the ear
Free space in front of the profile
Face turned to right of frame
Focus for the eye to be sharp
Shutter speed 1/80, ISO 200, and f/9–f/11
Keep the same flash settings and right side flash on and turn the flash toward the face side of the head.
Rules for framing an oblique facial picture
To get consistent turning of the head in oblique facial pictures, try to standardize head position using either of the following techniques:
Try to capture the sclera of the left side of the left eye[3] as shown in Figure 16
 Figure 16
- For standardizing the head angle during oblique portraits, have the patient looking forward, and try to visualize the sclera of the eye of the other side
Turn the head till the tip of the nose aligns with the cheek contour
Focus for the eye to be sharp
Use the same camera and flash settings as for profile.
Rules for framing an intraoral frontal picture
In orthodontics, following a set of intraoral photographs is mandatory for each patient.
The occlusal plane should be parallel to the sides of the frame [Figure 17]
 Figure 17
- Intraoral frontal picture
Equal amounts of left and right side of the teeth should be seen
The camera lens should be directed exactly perpendicular to the surface of the front teeth
No distractions such as cheek retractors, fingers, and labels.
Do not direct the camera either from below or from above the occlusal plane
All parts of the dental arches should be in sharp focus. Therefore, use a high f-stop (22 and above) and focus for the canine to be sharp
Shutter speed 1/80, ISO 200, and f/29–f/32
Flash setting is at TTL. Keep both the sides flash on.
Rules for framing an intraoral lateral picture
Ensure a parallel orientation of the occlusal plane to the borders of the frame [Figure 18]
 Figure 18
- (a) Intraoral right lateral. (b) Intraoral left lateral
Ensure that the distal of the contralateral central incisor is at the anterior border of the frame and the mesial of the second molar is at the posterior border of the frame
Ensure that equal amounts of the upper and the lower sulci are seen
All teeth should be in focus, so focus for the canine-premolar region to be sharp
No distractions such as cheek retractors, fingers, and labels.
You can use an intraoral mirror to get a more lateral view of the dentition. Use a single cheek retractor on the opposite side of the mirror
Shutter speed 1/80, ISO 200, and f/29–f/32
Flash setting is at TTL. Keep the right side flash on for the right profile and left side flash on for left profile. This will eliminate the soft shadow that appears when both the flashes are on.
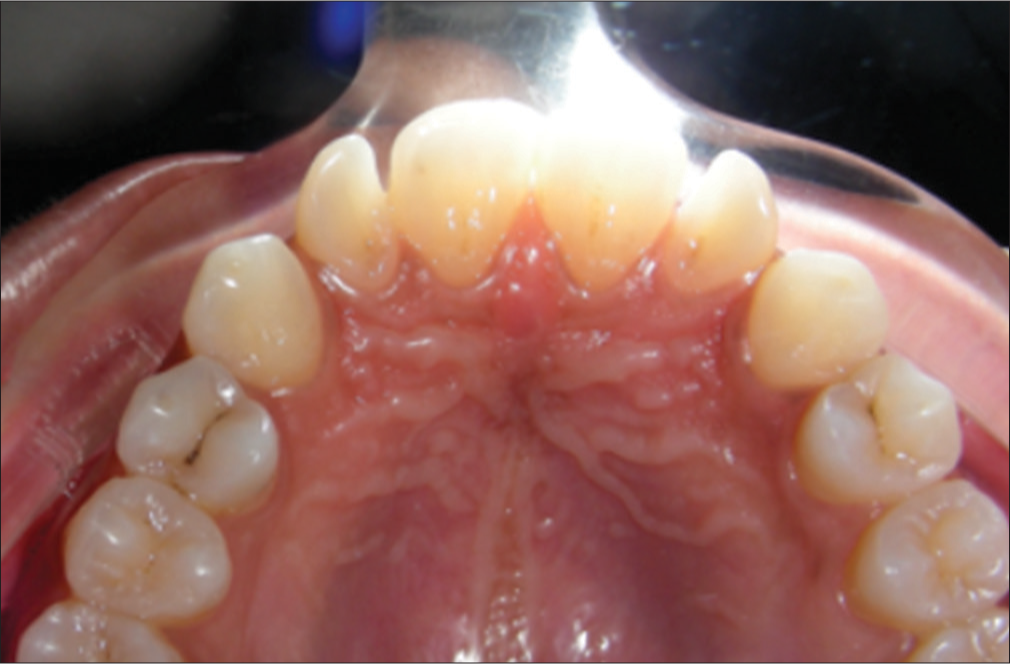
Rules for framing an intraoral occlusal picture
Use of an intraoral mirror is mandatory [Figure 19]
 Figure 19
- (a) Intraoral occlusal mirror view upper. (b) Intraoral occlusal mirror view lower
The composition should cover the arch from the distal of at least the first molar to the anterior teeth
The indirect view in the mirror should be such that the surface of the teeth is exactly perpendicular to the camera lens
Equal space should be present buccal to the molars on both the right and left sides
Focus for the occlusal surfaces of the teeth to be sharp
Shutter speed 1/80, ISO 200, and f/29–f/32
Flash setting is at TTL. Keep both the sides flash on
Fogging of the mirror in the posterior surface can be avoided by blowing air from a distance using the three-way syringe. Take care to avoid having the nozzle of the syringe in the frame
For the lower occlusal photograph, the tongue should be out of the frame as far as possible.
Please refer further to the ABO guidelines for further cues on standardization.[4]
COMMON MISTAKES IN CLINICAL PHOTOGRAPHY
McKeown published an excellent paper[5] summarizing exactly what to aspire to in clinical photography. The paper also details all common sources of error, along with recommendations on how to avoid these errors. The quality of photographs taken by three different groups of operators has been compared, and it was demonstrated that orthodontists produced better intraoral photographs than both auxiliaries and professional medical photographers. Focusing and head tipping was identified as a common problem with extraoral photographs, while the presence of saliva, occlusal plane issues, and soft tissue retraction was common problems with intraoral photographs. Common errors have been listed here.
Incorrect angle due to not using an occlusal mirror [Figure 20].
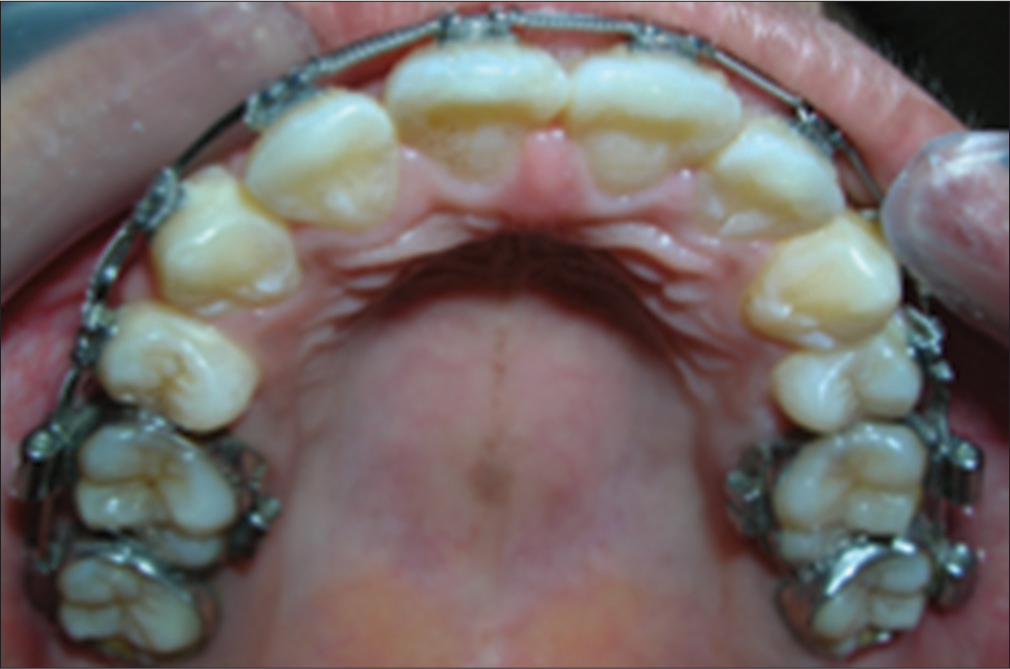
- Incorrect camera angle, especially when a mirror is not used
Incorrect composition has caused a loss of data from the right side of the subject in this frontal view. The occlusal plane is also poorly centered horizontally causing the lower sulcus to be more visible [Figure 21].

- Incorrect composition
Part of the face and the cheek retractors are distracting elements taking attention away from the subject. Photograph needs to be cropped digitally [Figure 22].
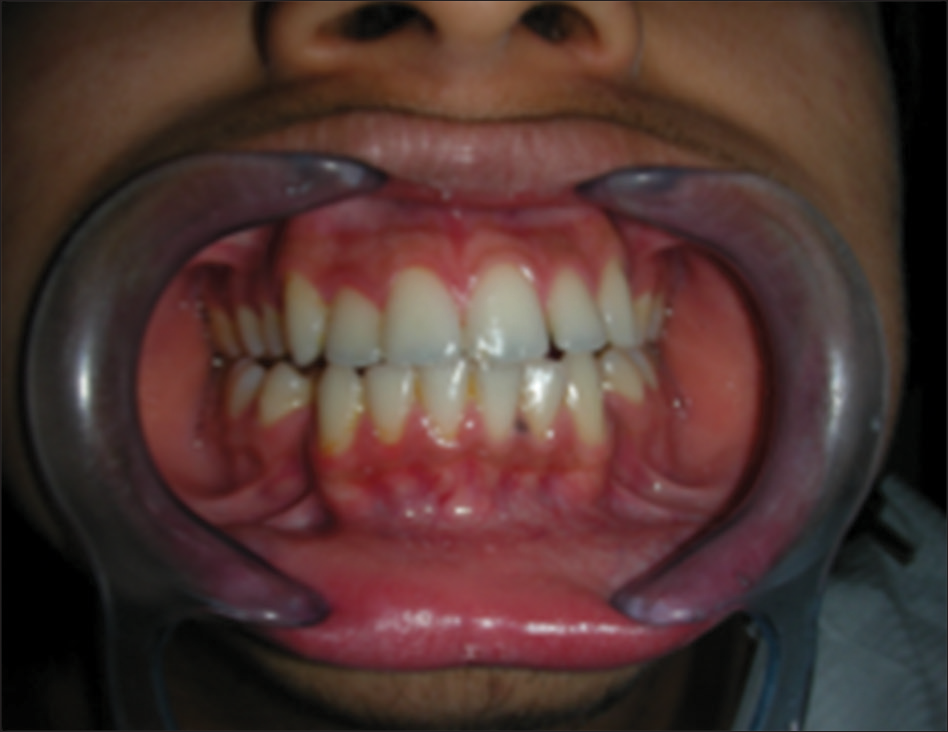
- Too much distractions in composition
Blurring due to either unsteady subject or camera shake while clicking [Figure 23].
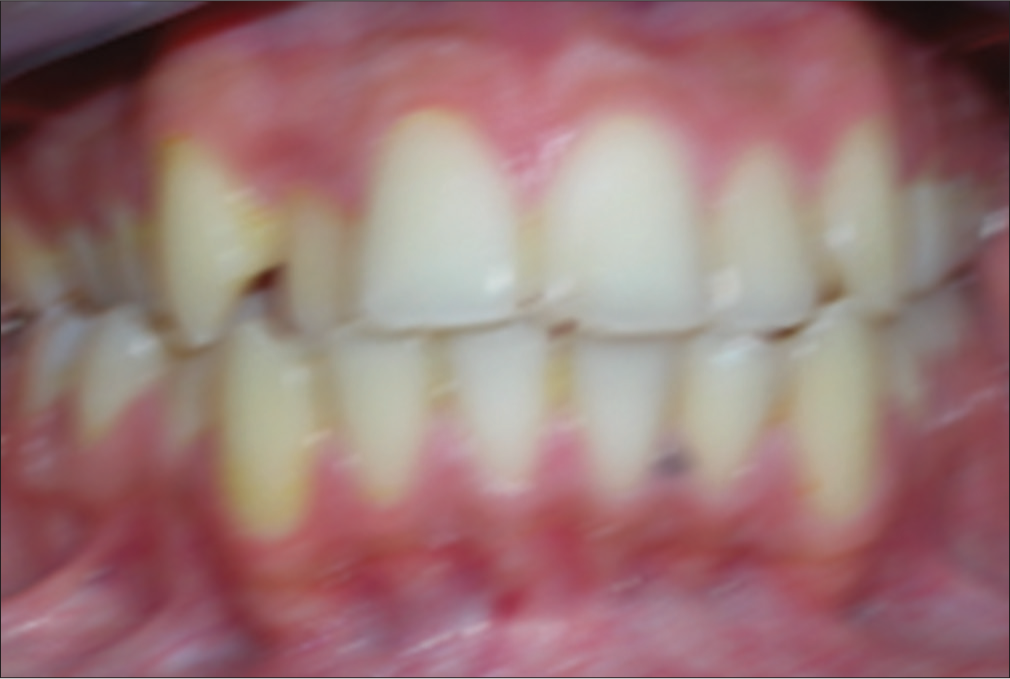
- Blurring of image due to camera shake or head movement of patient
Incorrect exposure and severe barrel distortion causing anterior to look disproportionately larger and presenting a highly unacceptable picture [Figure 24].
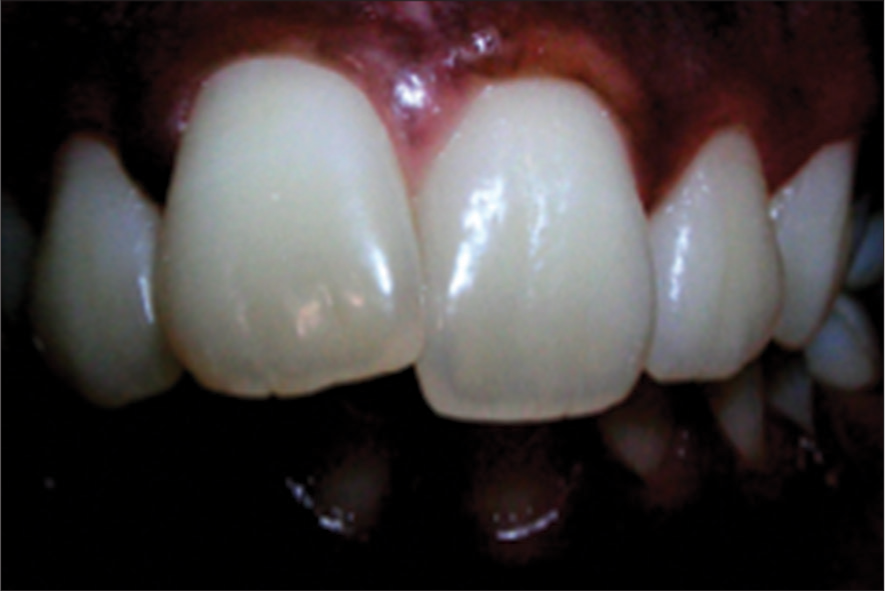
- A highly unacceptable image
Declaration of patient consent
The authors certify that they have obtained all appropriate patient consent forms. In the form the patient(s) has/have given his/her/their consent for his/her/their images and other clinical information to be reported in the journal. The patients understand that their names and initials will not be published and due efforts will be made to conceal their identity, but anonymity cannot be guaranteed.
Financial support and sponsorship
Nil.
Conflicts of interest
There are no conflicts of interest.
References
- Clinical photography in an orthodontic practice environment part 2. Orthod Update. 2010;3:107-9.
- [CrossRef] [Google Scholar]
- Comparison of 10 digital SLR cameras for orthodontic photography. J Orthod. 2006;33:223-30.
- [CrossRef] [PubMed] [Google Scholar]
- Mastering digital dental photography (1st ed). Berlin, Germany: Quintessence Publishing; 2006.
- Guidelines for Photographs and Radiographs. Available from: https://www.americanboardortho.com/media/1206/example-photos-radiographs.pdf. [Last accessed on 2017 Jan 08]
- [Google Scholar]
- How to avoid common errors in clinical photography. J Orthod. 2005;32:43-54.
- [CrossRef] [PubMed] [Google Scholar]


