Translate this page into:
A New 2 D Bracket Positioning Gauge
Address for correspondence: Dr. Bhuwan Saklecha, Department of Orthodontics, Index Institute of Dental Sciences, Indore, Madhya Pradesh, India. E-mail: bhuwan.saklecha@ gmail.com
This article was originally published by Wolters Kluwer and was migrated to Scientific Scholar after the change of Publisher.
Abstract
Bracket positioning is the basic premise of pre-adjusted system, which allows the teeth to be placed with a straight wire into an occlusal contact with an excellent mesiodistal inclination (tip) and excellent faciolingual inclination (torque). Improper bracket placement may lead to poorly placed teeth and necessitate bracket repositioning and archwire adjustments. This can lead to an increased treatment time or poor occlusion. Therefore, a bracket positioning gauge has been designed using both the planes and evaluated for its accuracy in bonding of brackets. It was found that the gauge not only helped in the placement of brackets accurately, but also reduced chairside time.
Keywords
Brackets
gauge
bracket positioning
Introduction
The basic premise of the preadjusted system is that proper bracket position allows the teeth to be placed with a straight wire into an occlusal contact with an excellent mesiodistal inclination (tip) and excellent faciolingual inclination (torque). All the information required to position a tooth in three planes is included in the brackets placed at the midpoint of the facial axis of the clinical crown, defined by facial axis point (FA).[1-4] Over the last 40 years, several changes have been made to Andrews’ appliance with improvements in preadjusted appliances, without bends on the archwire, to achieve the ideal alignment and leveling, but the most important phase is still the bracket placement.
In order to get the full expression of a PEA bracket, a precise bracket positioning added to a full-size wire would yield a complete expression of the bracket. Improper bracket placement may lead to poorly placed teeth and necessitate bracket repositioning and archwire adjustments.[5,6] This can lead to an increased treatment time or poor occlusion.[7] Therefore, a bracket positioning gauge has been designed using both the planes and evaluated for its accuracy in bonding of brackets.
Appliance Construction
The existing bracket placement gauge (Denticon Pvt., Ltd., Mumbai, India) was modified to construct this modified gauge to increase clinical efficiency.
The steps in constructing the bracket gauge are:
A two inch band material of 0.180” x 0.006” is taken and is folded on to each other and then welded.
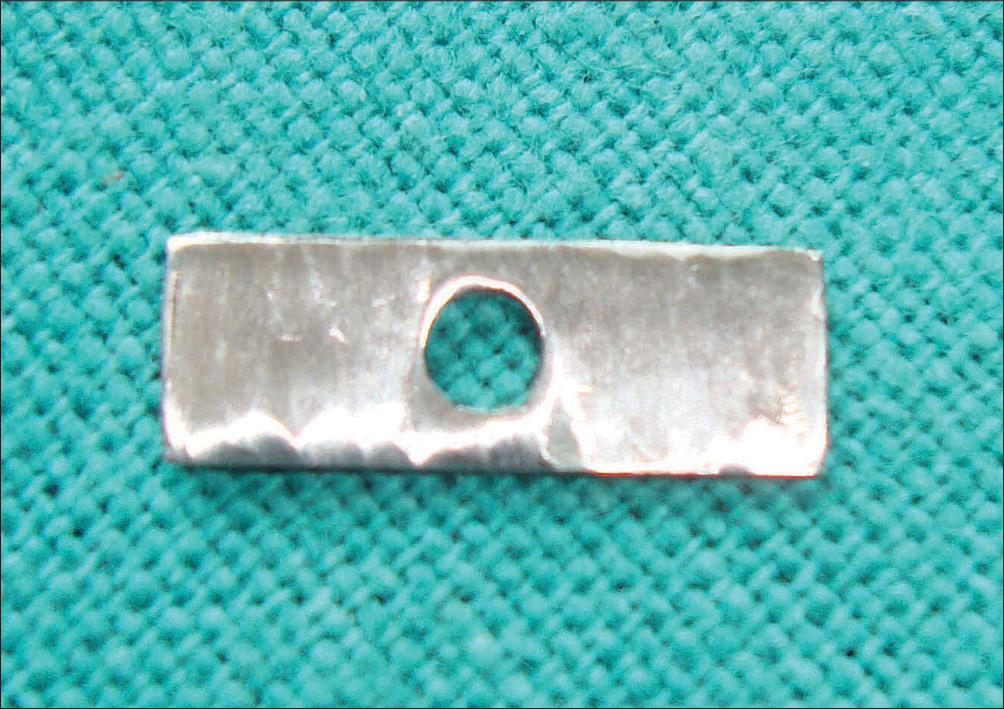
A hole of 3 mm in diameter is drilled into the center of the band [Figure 1].
 Figure 1
- A hole of 3 mm diameter drilled into the centre of the band
A small piece of straight 0.016 x 0.022” SS wire is taken, which is bent into “L” shape such that the vertical arm is of 10 mm for maxillary anteriors and mandibular canines and 7 mm for mandibular incisors, maxillary and mandibular premolars. The smaller horizontal leg of the wire is welded on one end of the band at the center [Figure 2].
 Figure 2
- “L” shaped 0.016 x 0.022” SS wire welded on one end of the band at the centre
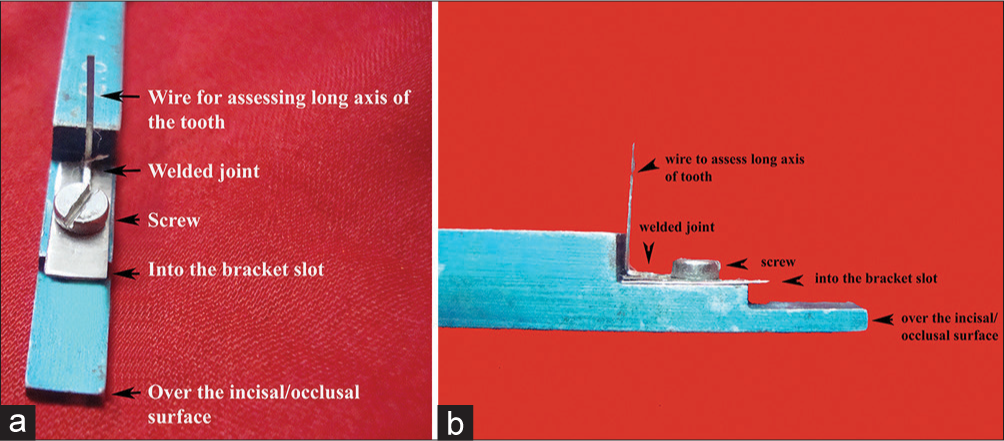
The band material is then fastened on the bracket gauge with the help of a screw such that the wire for assessing the long axis of the tooth is on the opposite side of the measuring side of the band, which will be used to assess vertical positioning of the bracket [Figure 3].
 Figure 3
- Frontal view of the modified bracket gauge with the vertical arm welded on the opposite side of the end of the measuring side of the gauge (a). Lateral view of the modified bracket gauge with the vertical arm welded on the opposite side of the end of the measuring side of the gauge (b)
Appliance Usage
After enamel etching, priming and transfer of the bracket with adhesive attached to its bonding base, position the horizontal arm of the gauge into the bracket slot.
To prevent vertical errors of bracket placement, hold the gauge at right angles to the labial surface of the tooth to be bonded. This can be easily assessed by viewing from the lateral side and checking the parallelism of the vertical arm of the gauge with the labial surface of the tooth [Figure 4].
 Figure 4
- Assessing the vertical positioning of the brackets using the modified bracket gauge on anterior teeth (a). Assessing the vertical positioning of the brackets using the modified bracket gauge on posterior teeth (b)
Horizontal errors of bracket placement can be precluded by assessing the parallelism of the vertical arm of the gauge with that of the long axis of the tooth and the bracket on frontal viewing. This parallelism is checked by direct frontal viewing, the bisection of the tooth and the bracket longitudinally, with the vertical arm of the bracket gauge [Figure 5].
 Figure 5
- Assessing the horizontal positioning of brackets using the modified bracket gauge on canine tooth (a). Assessing the horizontal positioning of brackets using the modified bracket gauge on incisors (b)
Discussion and Conclusion
The gauge is simple and easy to fabricate, unlike other gauges, which are difficult to fabricate and are cumbersome.[5,8] The bracket positioning is simplified with an added advantage of reduced chair-side time. The vertical arm of the gauge assists in eliminating both vertical and horizontal bracket placement errors. Hence, the need for repositioning the bracket in finishing stage is reduced.
Financial support and sponsorship
Nil.
Conflicts of interest
There are no conflicts of interest.
References
- Comparison of the accuracy of bracket placement with height bracket positioning gauge and boone gauge. J Dent Res Dent Clin Dent Prospects. 2011;5:111-8.
- [Google Scholar]
- A comparison of accuracy in bracket positioning between two techniques — Localizing the centre of the clinical crown and measuring the distance from the incisal edge. Eur J Orthod. 2007;29:430-6.
- [CrossRef] [PubMed] [Google Scholar]
- Systemised Orthodontic Treatment Mechanics. Edinburgh: Mosby Inc.; 2001.
- The accuracy of brackets placement in direct bonding technique: A comparison between the pole-like bracket positioning gauge and the star-like bracket positioning gauge. Open J Stomatol. 2011;1:121-5.
- [Google Scholar]


